Complete Guide to Cat Grooming: Brushing, Bathing, and Nail Care (2026)
Master essential cat grooming techniques for a healthier, happier feline. Learn step-by-step brushing, bathing, and nail care to strengthen your bond and prevent common health issues.
Share this page
Complete Guide to Cat Grooming: Brushing, Bathing, and Nail Care (2026)
Proper grooming is a cornerstone of your cat's health, comfort, and well-being. Beyond a shiny coat, a consistent grooming routine prevents health issues, reduces shedding, and deepens the bond between you and your feline friend. This comprehensive guide provides modern, practical advice for grooming cats of all coat types.
Why Grooming Matters
Regular grooming offers a dual benefit: it's a proactive health check and a powerful bonding ritual.
Health Benefits
Prevents Matting: Mats pull on the skin, causing pain, irritation, and potential infections.
Reduces Hairballs: Brushing removes loose fur before your cat ingests it during self-grooming.
Enables Early Detection: You become familiar with your cat's body, making it easier to spot lumps, bumps, parasites, or skin abnormalities early.
Promotes Parasite Control: Regular sessions help you quickly identify fleas, ticks, or signs of mites.
Aids Temperature Regulation: A well-maintained coat insulates your cat effectively in both heat and cold.
Bonding & Behavioral Benefits
Strengthens Your Relationship: Gentle handling builds immense trust.
Reduces Stress: Many cats find rhythmic brushing soothing and relaxing.
Improves Socialization: Kittens groomed regularly grow into adults more comfortable with handling and vet visits.
Complete Guide to Cat Grooming: Brushing, Bathing, and Nail Care (2026) - Articles
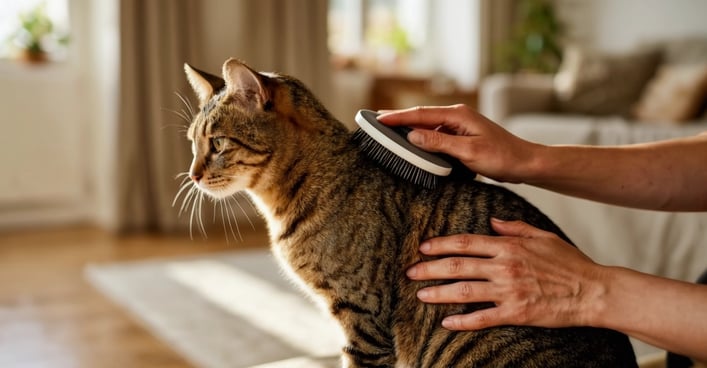
Brushing Your Cat: A Complete Guide
How Often to Brush
Frequency varies significantly by coat type:
Coat Type
Brushing Frequency
Ideal Session Length
Long-haired (e.g., Persian, Maine Coon)
Daily
10-15 minutes
Medium-haired (e.g., American Shorthair)
2-3 times per week
5-10 minutes
Short-haired (e.g., Siamese, Bengal)
Weekly
5 minutes
Hairless (e.g., Sphynx)
Weekly (for skin care)
10 minutes
Choosing the Right Brush
Selecting the proper tool is half the battle. Here’s a breakdown:
Slicker Brush
Best For: Removing loose topcoat hair and preventing mats.
Ideal For: All coat types, especially long and medium hair.
Technique: Use gentle strokes in the direction of hair growth.
Bristle Brush
Best For: Smoothing the coat and distributing natural skin oils for a healthy shine.
Ideal For: Short to medium coats.
Technique: Long, smooth strokes from head to tail.
Pin Brush
Best For: General detangling and finishing.
Ideal For: Long and medium coats without severe mats.
Technique: Work through sections gently, starting from the tips.
Deshedding Tool
Best For: Penetrating the topcoat to remove the dense undercoat, drastically reducing shedding.
Ideal For: Double-coated breeds like Norwegian Forest Cats and Siberian cats.
Technique: Use sparingly (1-2 times per week) and avoid pressing too hard to prevent skin irritation.
Dematting Comb/Rake
Best For: Safely breaking up existing mats.
Ideal For: Long-haired cats with minor to moderate tangles.
Technique: Hold the base of the mat close to the skin to minimize pulling, and gently work the comb from the tip inward.
Grooming Glove
Best For: Cats who are apprehensive about traditional brushes.
Ideal For: All coat types, particularly for introductory sessions.
Technique: Pet your cat as you normally would; the silicone nubs will catch loose hair.
Brushing Technique: A Step-by-Step Approach
Step 1: Set the Stage
Choose a quiet time when your cat is calm, perhaps after a meal or play session.
Gather your brush, treats, and place your cat on a stable, comfortable surface.
Step 2: Begin with Positive Association
Start by petting areas your cat enjoys, like the cheeks or under the chin.
Introduce the brush gently, pairing each stroke with a treat or verbal praise.
Step 3: Systematic Brushing
Work methodically: head, neck, shoulders, back, sides, belly (if tolerated), legs, and tail.
Pay Special Attention to Mat-Prone Areas: Behind the ears, under the collar, the "armpits," and the "britches" (back of the hind legs).
Step 4: Conduct a Health Check
As you brush, feel for any unusual lumps, bumps, or areas of sensitivity.
Look closely at the skin for redness, flakes, parasites, or signs of irritation.
Step 5: End on a High Note
Conclude the session with gentle brushing in a favorite spot.
Always finish with a high-value treat or a few minutes of cuddling.
Dealing with Mats
Prevention is Key: Consistent brushing is the best defense against mats.
Removing Small Mats:
Hold the base of the mat firmly between your fingers to protect the skin.
Use a dematting comb or your fingers to gently tease the mat apart, working from the outer edge toward the base.
Never use scissors, as it's easy to cut the skin trapped inside the mat.
When to Call a Professional:
Mats are large, numerous, or tight against the skin.
The matted area is red, inflamed, or has a foul odor.
Mats are located in sensitive areas (face, groin, armpits).
Your cat becomes highly stressed or aggressive during attempts.
Bathing Your Cat
Do Cats Really Need Baths?
Most cats are self-cleaning experts and rarely require full baths. However, bathing becomes necessary in specific situations:
Medical Reasons: Treatment for skin conditions, fungal infections, or severe flea infestations.
Reduced Mobility: Senior cats, obese cats, or those with arthritis may struggle to groom effectively.
Coat Maintenance: Some long-haired breeds benefit from occasional baths, and hairless breeds require weekly baths to manage skin oils.
Accidents: If your cat gets into something sticky, toxic, or foul-smelling that shouldn't be licked off.
Bathing Supplies Checklist
Cat-Specific Shampoo: pH-balanced for feline skin (human shampoo is too harsh).
Non-Slip Mat for the bottom of the sink or tub.
Washcloth for cleaning the face without getting water in the eyes/ears.
Several Large, Absorbent Towels.
A pitcher or handheld sprayer with a gentle flow.
High-Value Treats for post-bath rewards.
Step-by-Step Bathing Guide
Preparation (The Most Important Step):
Brush your cat thoroughly to remove all loose hair and tangles.
Trim their nails to minimize accidental scratches.
Place the non-slip mat in a sink or shallow tub and fill it with 3-4 inches of lukewarm water.
The Bathing Process:
Wet the Coat: Gently pour water or use a sprayer, thoroughly wetting the body while avoiding the head, ears, and eyes.
Apply Shampoo: Lather a small amount of shampoo, working from the neck down to the tail. Never pour shampoo directly on your cat.
Massage Gently: Use calm, massaging motions—avoid vigorous scrubbing.
Rinse Meticulously: Rinse until the water runs completely clear. Residual shampoo is a common cause of skin irritation.
Clean the Face: Use only a damp, shampoo-free washcloth to wipe the face.
After the Bath:
Lift your cat from the water and wrap them immediately in a dry towel.
Gently blot and squeeze the coat—do not rub, as this can cause tangles.
Keep your cat in a warm, draft-free room until completely dry. A low-heat blow dryer can be used if your cat is accustomed to the noise.
Offer praise and their favorite treat to create a positive association.
Pro Bathing Tips
Your Energy Matters: Stay calm and speak softly; your cat will mirror your demeanor.
Efficiency is Key: Aim for a total bath time of 5-10 minutes.
Know When to Stop: If your cat panics, end the session and try again another day. Forcing the issue will make future baths more difficult.
Consider a Professional: For cats with extreme anxiety or for complex tasks like dematting, a professional groomer is a safe and stress-free option.
Nail Trimming
Why It's Essential
Regular trims prevent nails from overgrowing, curling into the paw pads (a painful condition), splitting, and causing damage to your furniture and skin.
How Often to Trim
Frequency: Every 2-3 weeks for most cats.
Signs It's Time:
You hear a distinct "clicking" on hard floors.
Nails get caught on carpets, blankets, or your clothing.
You can see the nails curling under when your cat is at rest.
Nail Trimming Tools
Scissor-Style Clippers: Offer good control and visibility, ideal for beginners.
Guillotine Clippers: Provide a quick, clean cut but require proper nail positioning.
Nail Grinders: File the nail down smoothly, eliminating sharp edges. Some cats dislike the vibration and noise.
Styptic Powder or Gel: An essential safety item to stop bleeding if the quick is accidentally nicked.
Step-by-Step Nail Trimming
Step 1: Get Ready
Choose a time when your cat is sleepy or relaxed.
Have your clippers and styptic powder within easy reach.
Ensure you have bright, direct light.
Step 2: Position Your Cat Comfortably
Hold your cat in your lap or place them on a stable surface.
Gently press the paw pad to extend the claw.
Step 3: Identify the Quick
The quick is the pink, vascular tissue inside the nail.
Only trim the white/clear tip of the nail, well clear of the quick.
For dark nails: Trim tiny slivers at a time and look for a grayish-pink oval in the center of the cut end—this signals you're nearing the quick.
Step 4: Make the Cut
Cut perpendicular to the nail (straight across).
Trim all claws on the front paws (most cats have 5, including the dewclaw).
Back claws often require less frequent trimming.
Step 5: If You Cut the Quick
Don't panic. Apply styptic powder or a dab of cornstarch to the tip and apply light pressure for 30 seconds.
Comfort your cat; the bleeding will stop quickly.
Tips for Trimming a Reluctant Cat's Nails
The One-Nail-a-Day Method: Trim a single claw per session, followed by a treat, until your cat is more comfortable.
The "Purrito" Technique: Gently wrap your cat in a towel, exposing only one paw at a time.
Seek Help: Your veterinarian or a groomer can demonstrate the technique or perform the trim for you.
Start Young: Acclimating kittens to nail trims sets them up for a lifetime of easy grooming.
Ear Cleaning
When and How Often to Clean
Monthly for most healthy cats.
Weekly for breeds prone to wax buildup (e.g., Sphynx, Scottish Folds) or cats with a history of ear issues.
Only clean the visible parts of the ear; never probe deep into the ear canal.
Signs of an Ear Problem
Frequent head shaking or scratching at the ears.
Redness, swelling, or a foul odor from the ear.
Black, brown, or yellow discharge.
Crusty skin or hair loss around the ear.
Note: These symptoms warrant a veterinary visit, not just a cleaning.
Safe Ear Cleaning Technique
Apply a veterinary-approved ear cleaner to a cotton ball or gauze pad.
Gently wipe the visible inner flap of the ear and the entrance to the ear canal.
Allow your cat to shake its head—this helps bring deeper debris to the surface.
Wipe away any dislodged material with a fresh cotton ball.
Reward your cat with a treat.
⚠️ Critical Safety Note:Never use cotton swabs (Q-tips) inside your cat's ear canal. They can push debris deeper and risk perforating the eardrum.
Dental Care
The Importance of Oral Health
Dental disease is one of the most common health issues in cats. Bacteria from the mouth can enter the bloodstream, potentially damaging the heart, kidneys, and liver.
Dental Care Options
Tooth Brushing (The Gold Standard)
Use a soft-bristled finger brush or pet-specific toothbrush and cat-formulated toothpaste (never human toothpaste, which contains toxic xylitol and fluoride).
Start by letting your cat lick the paste, then progress to rubbing their gums with your finger, and finally introduce the brush.
Focus on the outer surfaces of the teeth, where plaque accumulates most.
VOHC-Approved Dental Treats & Diets
The Veterinary Oral Health Council (VOHC) seal indicates products proven to reduce plaque and tartar.
These are helpful supplements but not a replacement for brushing.
Dental Wipes or Sprays
Can be easier to manage than a brush for some cats.
Generally less effective at cleaning below the gumline but better than no care at all.
Professional Veterinary Cleanings
Essential for removing tartar below the gumline.
Performed under anesthesia for safety and thoroughness.
Frequency depends on your cat's individual needs (typically annually).
Grooming by Coat Type: A Quick Reference
Long-Haired Cats (Persians, Ragdolls, Himalayans)
Daily: Full-body brushing to prevent mats. Clean tear stains and facial folds for flat-faced breeds.
Weekly: Check for and address small mats in high-friction areas (armpits, behind ears).
Monthly/As Needed: Sanitary trim (hair around the rear), paw pad fur trimming, consider professional grooming.
Consult Your Vet: To diagnose or rule out parasites, fungal infections, or other skin conditions.
Professional Grooming Services
When to Hire a Professional
Severe Matting: Home removal is often painful and risky.
Behavioral Challenges: If grooming causes extreme stress or danger.
Specialized Styling: Breed-specific clips or "lion cuts" for long-haired cats.
Medical Grooming: For cats with mobility issues, senior cats, or post-surgical needs.
How to Choose a Cat Groomer
Specialization: Seek a groomer who explicitly advertises experience with cats (not just dogs).
Certifications: Look for credentials from organizations like the National Cat Groomers Institute (NCGI).
Environment: The facility should be clean, quiet, and separate from noisy dog grooming areas.
Policies: They should never sedate your cat without direct veterinary instruction and supervision.
References: Read reviews and ask your veterinarian or local cat community for recommendations.
Grooming Costs: DIY vs. Professional
Initial DIY Grooming Kit Investment
Item
Approximate Cost
Quality Slicker Brush
$15 - $30
Deshedding Tool
$25 - $45
Nail Clippers & Styptic Powder
$15 - $25
Cat Shampoo & Conditioner
$10 - $20
Ear Cleaner
$10 - $15
Toothbrush & Cat Toothpaste
$10 - $20
Total Initial Investment
$85 - $155
Professional Grooming Service Costs
Service
Average Cost Range
Basic Groom (Bath, Brush, Nails, Ears)
$60 - $120
De-matting or Lion Cut
$90 - $200+
Full Groom with Styling
$120 - $250
Mobile Grooming (Convenience Fee)
+$30 - $75
Conclusion
A consistent, gentle grooming routine is one of the most caring investments you can make in your cat's long-term health and happiness. It transforms a necessary task into an opportunity for connection, trust, and proactive healthcare. Start slowly, be patient, use the right tools, and always prioritize a positive experience for your feline companion.
Final Key Takeaways:
Begin Early: Acclimate kittens to handling and grooming tools.
Consistency Wins: Short, regular sessions are more effective than occasional long ones.
Positive Reinforcement is Everything: Treats, praise, and patience build goodwill.
You Are Their First Line of Health Defense: Grooming sessions are your chance to spot potential issues early.
There's No Shame in Seeking Help: Professional groomers and veterinarians are valuable partners in your cat's care.
With this guide, you're equipped to provide excellent grooming care, ensuring your cat not only looks magnificent but feels their absolute best.
Get expert advice about cat care, behavior, nutrition, grooming, and training. Ask our AI cat care expert anything about your cat and receive professional guidance.